Ok, so I have little things that drive me crazy. Here's a few
* stepping out of the shower onto a carpeted floor.ughhhh. gross.
* leftovers ( I try to save them, I know it's *smart*, but I just can't eat them!)
* wearing a watch...gives me the willies!
* polo shirts on women ( that's a man's shirt, there are too many cute options to settle for a polo)
* crew neck t-shirts on ME.
SO that last one leads me to having shirts that have meaning to them to sit alone month after month in my drawer. I know they cry out to me. I do feel bad about this neglect. So after seeing this tutorial, I had a little glimmer of hope for all of these...
I love that I get a free T when I donate blood. Unfortunately many of these turn into *shirts I wear when I color my hair*. This one I got this weekend is a great navy color and I like the pop of yellow and nautical theme-ish look. It's a keeper to upcycle!
The other four are SUPER SUPER special to me! Each one represents a mission trip to Trinidad & Tobago with our church. The logos are even designed by one of our team members, I love each one of them. But my first confession today is that I don't wear them other than on our trip. I just don't wear crew neck t's and most of my t-shirts are men's style, boxy.
My dear friend in TandT just ordred a new sewing machine and shipped to me so I could test it out for her and bring it down to her in a few weeks. What a great craft to try on her new machine!
Thankfully all is wonderfully well with it because as soon as our boys found a big cardboard box in the house, they had a free for all! Thank you Auntie A for buying a new sewing machine!
So here's what I did to my first shirt...
I cut off the crew neck. And let me tell you how good that feels!! With this shirt I kept the rounded scoop neck shape. I folded the shirt in half to find the center. You can also look at the label to find the center. Basically you sew ( backstitching at both ends) a line down the middle from the top down to wherever you want it to stop. Your call. And I suppose it would depend on where your shirt logo starts.
You can make as many as you want across the front, going back and forth from the center one. Odd numbers look best, so 5-11 looks best. Then I turned under the raw edges and it cleaned it up a bit.
I also laid one of my favorite fitting shirts over top of this one to help as a guide as I brought in the sides. Not pictured, I tapered in the sides of the shirt when I turned it inside out. Just took in an inch or so and it added some shape to the sides.
In the above pic you can see that I wanted to add a little something to the back of the shirt too. I did the same here, found the center and folded it in half. Just did a few here to add more shape around the middle.
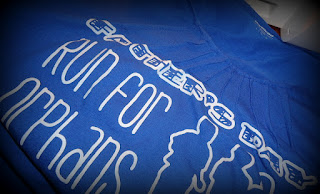
Here's the finished neckline. This is also a super special shirt that I'm really excited to actually wear! We ran in our first 5K together on Father's Day...A Run for Orphans. We had a great time with friends who share the same heart for the orphan.
Here it is...all finished! Now onto my other shirts!!!
What will you do with yours?


